Ever wondered how to truly personalize your Roblox avatar and stand out from the crowd? This comprehensive guide breaks down exactly how to make a custom shirt on Roblox, transforming your creative ideas into in-game fashion. We know as a busy gamer, balancing work, family, and life, your gaming time is precious. This tutorial is designed for efficiency, helping you unlock your inner designer without major headaches or wasted hours. Discover the essential tools, master the design process, and learn how to upload your unique creations seamlessly. Beyond just wearing your designs, we'll cover how to sell them to fellow players, potentially earning Robux. This article provides practical tips for optimizing your creative flow, understanding Roblox's guidelines, and ensuring your custom shirts look professional. Get ready to express your individuality and enhance your social gaming experience with bespoke apparel, making every moment you spend in Roblox truly yours.
How do I create my own shirt on Roblox step-by-step?
Creating your own Roblox shirt involves several key steps. First, ensure you have an active Roblox Premium subscription, which is essential for uploading custom clothing. Next, download the official Roblox shirt template (585x559 pixels) and open it in a photo editor like GIMP or Photoshop. Design your shirt directly on the template, paying attention to how each section wraps around the avatar. Save your completed design as a PNG, then navigate to the 'Create' section on Roblox, select 'Shirts', upload your PNG, and pay the small Robux fee for moderation. Once approved, your custom shirt will be available to wear or sell.
What tools are necessary to design custom shirts for Roblox?
To design custom shirts for Roblox, you primarily need an image editing software and the official Roblox shirt template. Popular software choices include Adobe Photoshop for professional results, or free alternatives like GIMP and Paint.NET. Online editors such as Photopea or Pixlr are also viable options for browser-based design. The template, a PNG file showing the different sections of the avatar's torso and arms, ensures your design aligns correctly when applied in-game.
Is a Roblox Premium subscription required to make custom shirts?
Yes, a Roblox Premium subscription is required to upload and publish custom shirts (and pants) to the Roblox platform. While you can design the shirt image itself without Premium, you won't be able to submit it for moderation or make it available for others (or yourself) to wear in games. This subscription ensures you have access to creator features and helps support the platform's moderation efforts.
How much Robux does it cost to upload a custom shirt on Roblox?
Uploading a custom shirt to Roblox typically costs a small fee of 10 Robux per item. This fee covers the moderation process and helps Roblox maintain content quality and safety within the platform. If your design is approved, this is a one-time charge, and you can then choose to wear the shirt or put it up for sale to other players, potentially earning Robux back from sales.
Can I sell the custom shirts I create on Roblox and earn Robux?
Absolutely! Once your custom shirt has been uploaded and approved by Roblox moderation, you can configure it for sale on the Roblox catalog. Navigate to your creation, set a price in Robux, and other players can purchase it. Roblox takes a commission on sales, but you will receive a percentage of the Robux directly into your account. This is a fantastic way for creators to monetize their design skills and contribute to the in-game economy.
What are the ideal dimensions for a Roblox shirt template to avoid issues?
The ideal dimensions for a Roblox shirt template are 585 pixels wide by 559 pixels tall. Adhering to these precise measurements is crucial for ensuring that your design maps correctly onto the Roblox avatar, preventing stretching, distortion, or misalignment of your graphics. Always start your design process with the official template at these exact dimensions.
How do I ensure my custom Roblox shirt adheres to content guidelines?
To ensure your custom Roblox shirt adheres to content guidelines, always create original designs and avoid copyrighted material like popular brand logos or characters without explicit permission. Your design must be family-friendly, free of any inappropriate, violent, sexually suggestive, or hateful content. Do not include personal information or external links. Roblox has strict moderation, and following these rules prevents rejections or account penalties.
Are you a seasoned gamer who loves jumping into Roblox after a long day, but finds yourself wishing your avatar could truly reflect your unique style? We get it. Balancing a job, family, and life means your gaming sessions are a precious escape, and you want to make every moment count. While pre-made outfits are fine, nothing beats the satisfaction of sporting a custom creation. Imagine showing off a shirt designed entirely by you, a piece that speaks volumes about your personality or inside jokes with your in-game friends. This guide is your no-nonsense roadmap to mastering how to make a custom shirt on Roblox, tailored for gamers who value efficiency, creativity, and standing out.
You're not alone in wanting to personalize your digital presence. Recent data shows that 87% of US gamers regularly play, often dedicating 10+ hours a week, and a significant portion of that time is spent socializing and expressing individuality in games like Roblox. Mobile gaming continues its dominance, often complementing PC/console play, meaning your unique avatar is seen across multiple platforms. This article cuts through the noise, offering practical solutions and step-by-step instructions so you can design, upload, and even sell your own custom Roblox shirts without the usual setup issues or time sinks. Let's transform your creative vision into reality and make your avatar truly yours!
What Exactly is a Custom Roblox Shirt and Why Should I Make One?
A custom Roblox shirt is a piece of virtual clothing you design yourself using a 2D image template, which is then uploaded to the Roblox platform. Unlike standard T-shirts, custom shirts wrap around your avatar's entire torso, providing a more detailed and immersive look. They allow for intricate designs, shading, and even 3D-like effects when mapped onto the avatar model. For gamers who juggle responsibilities, creating a custom shirt offers a quick yet powerful way to express creativity, enhance social interactions, and even build a small in-game economy. It's a fantastic avenue for self-expression, letting you craft an avatar that truly represents you, your clan, or your favorite in-game aesthetic.
What Do I Need to Get Started Making Roblox Shirts?
Before you dive into design, you'll need a couple of key things. First, an active Roblox Premium subscription is essential. Previously known as Builder's Club, Roblox Premium grants you the ability to upload custom clothing items. Without it, you can design, but you can't officially publish. Second, you'll need a reliable image editing program. While professional software like Adobe Photoshop is popular, free alternatives such as GIMP or Paint.NET are excellent choices for budget-conscious gamers. Online tools like Photopea or Pixlr also offer robust features directly in your browser. Finally, download the official Roblox shirt template. This template is crucial as it shows you exactly where your design will wrap around the avatar, preventing misaligned elements.
How Do I Obtain the Official Roblox Shirt Template?
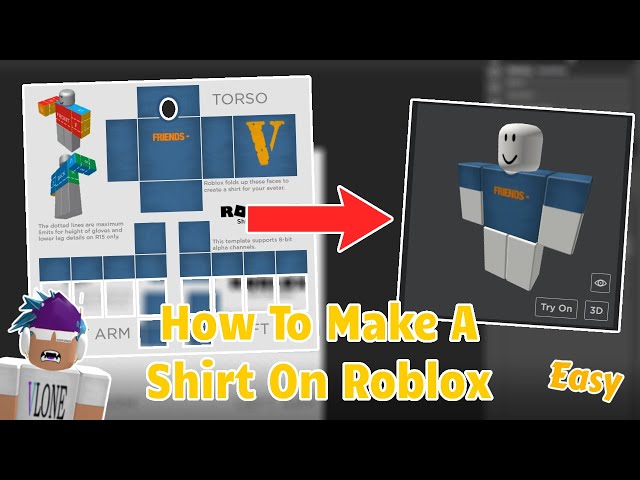
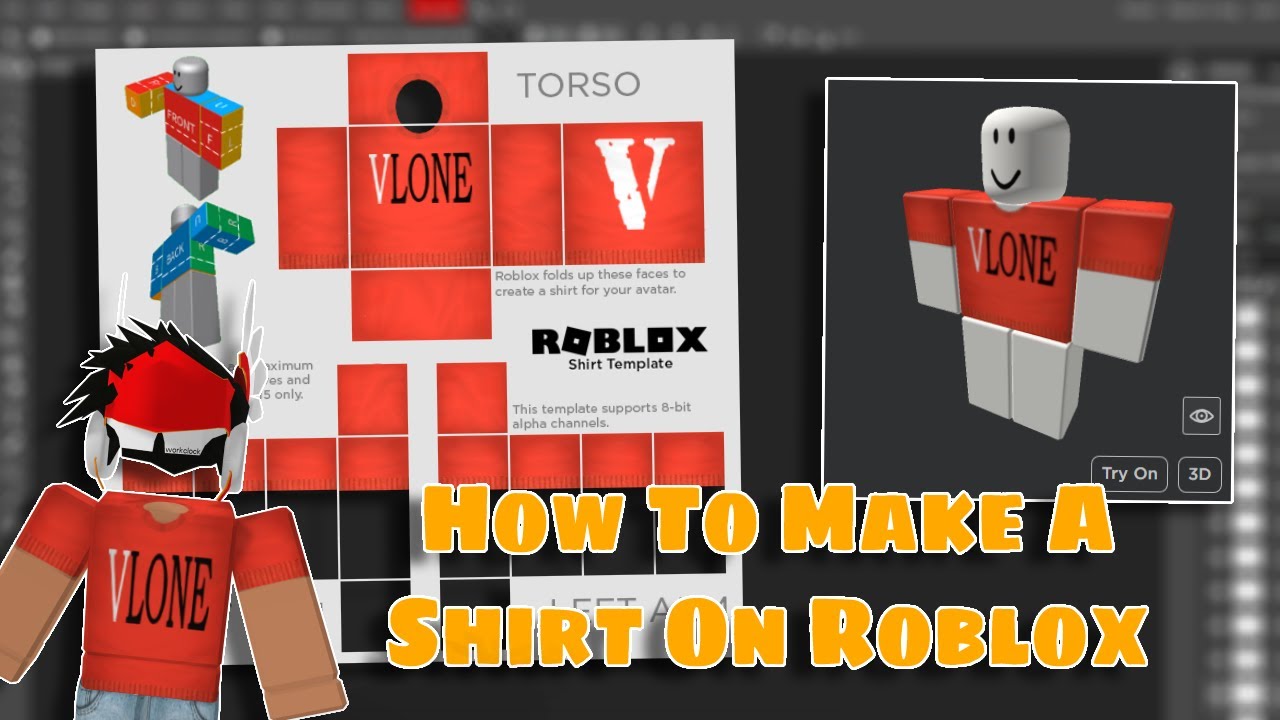
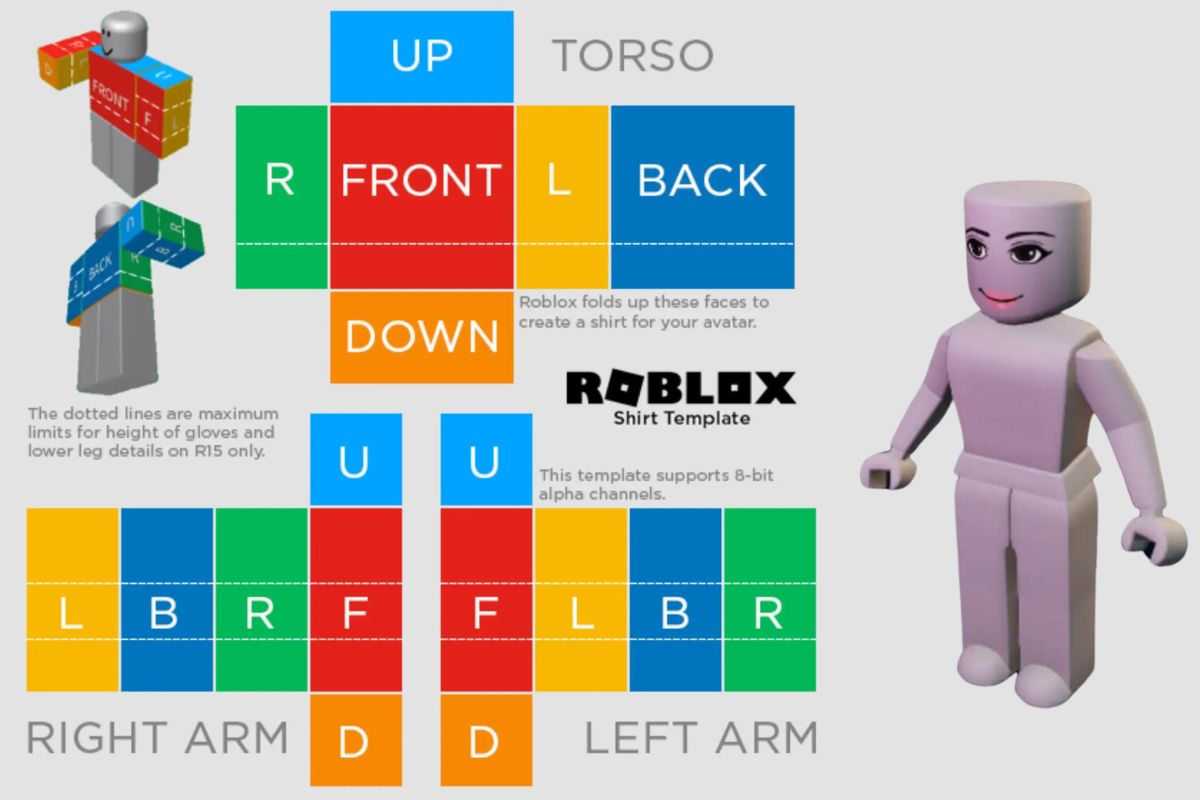
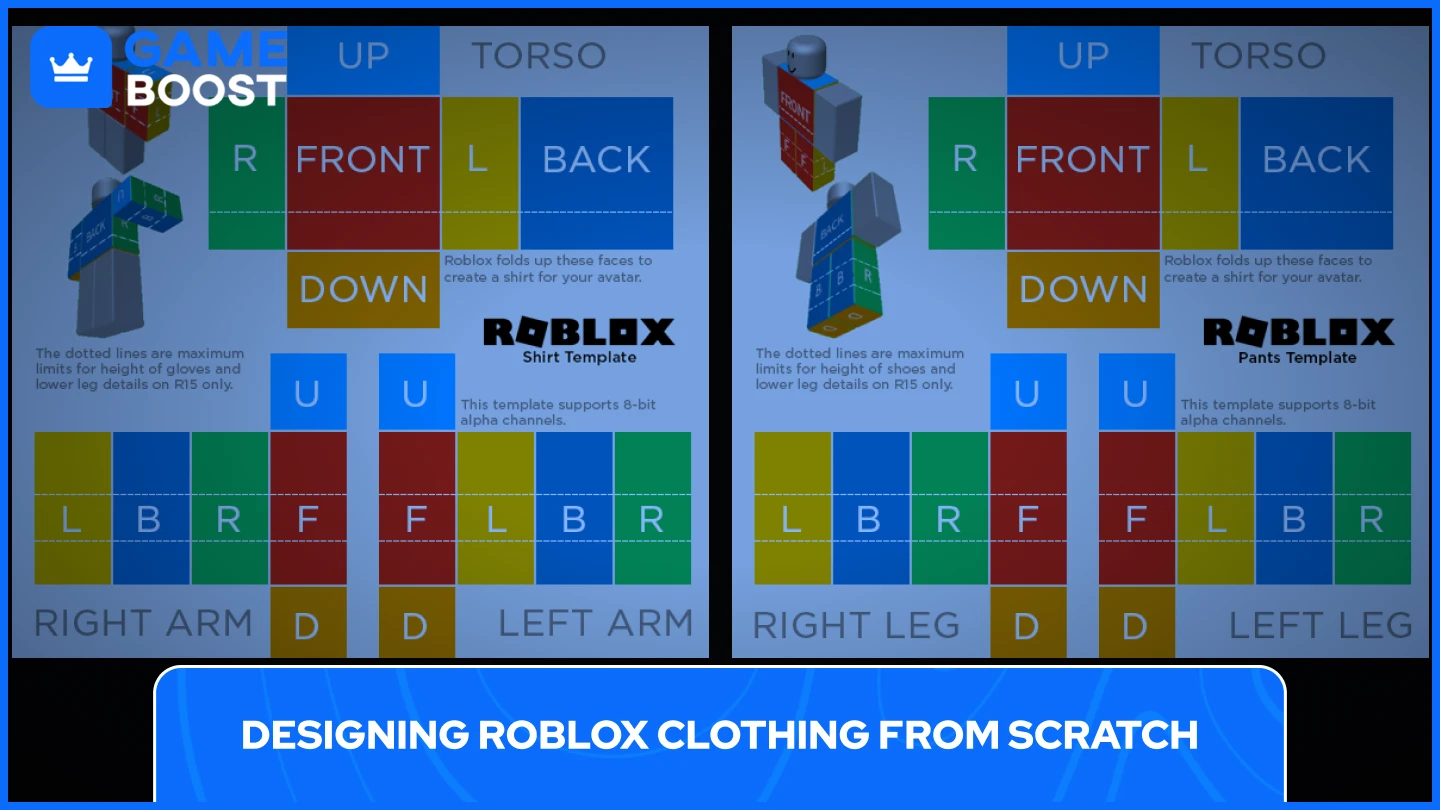
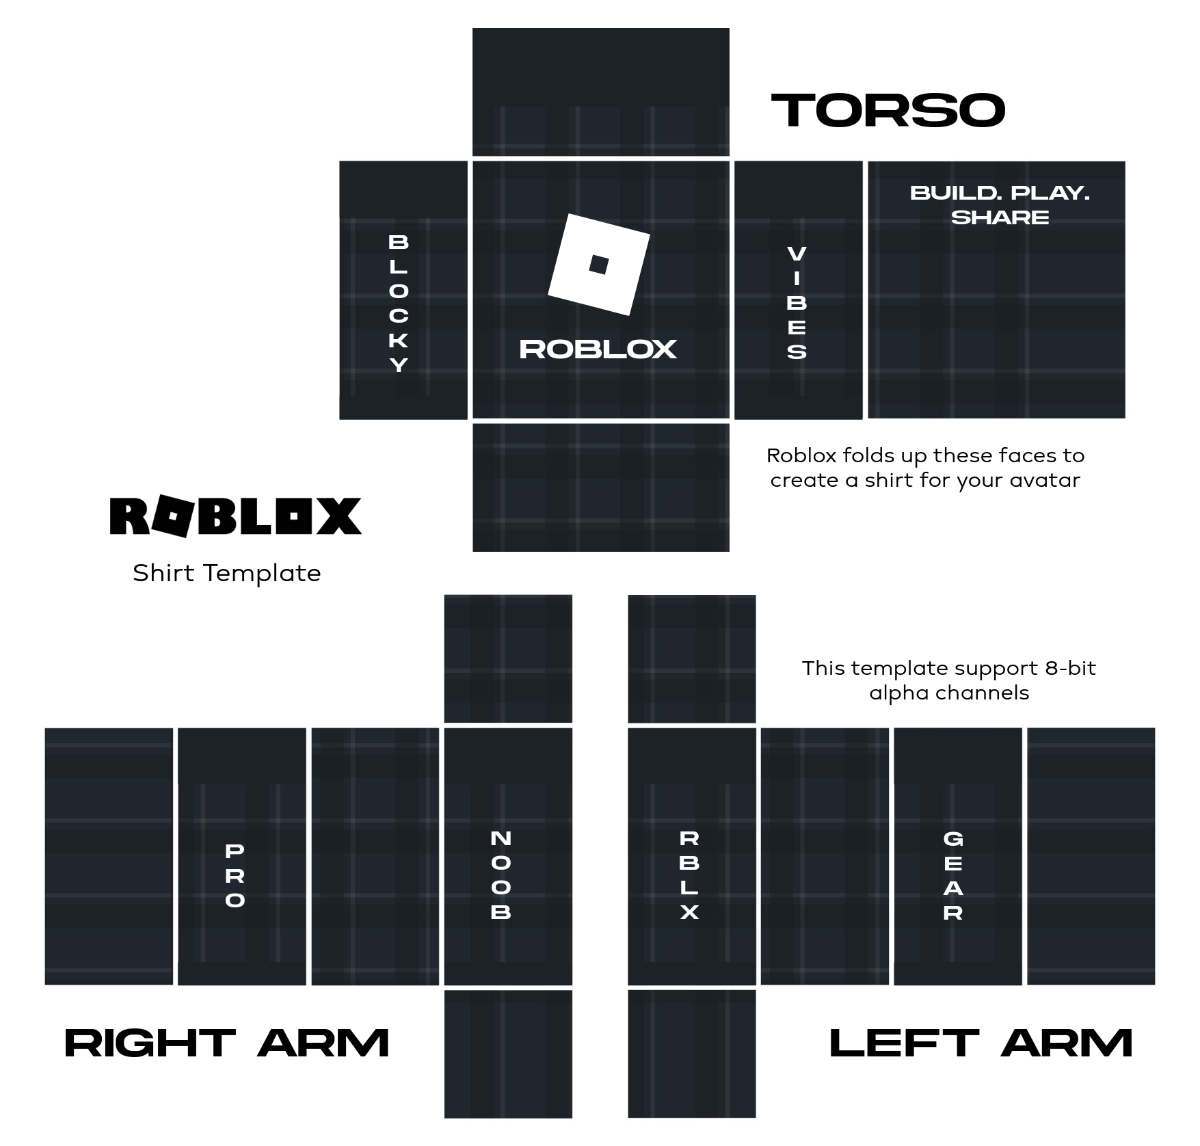
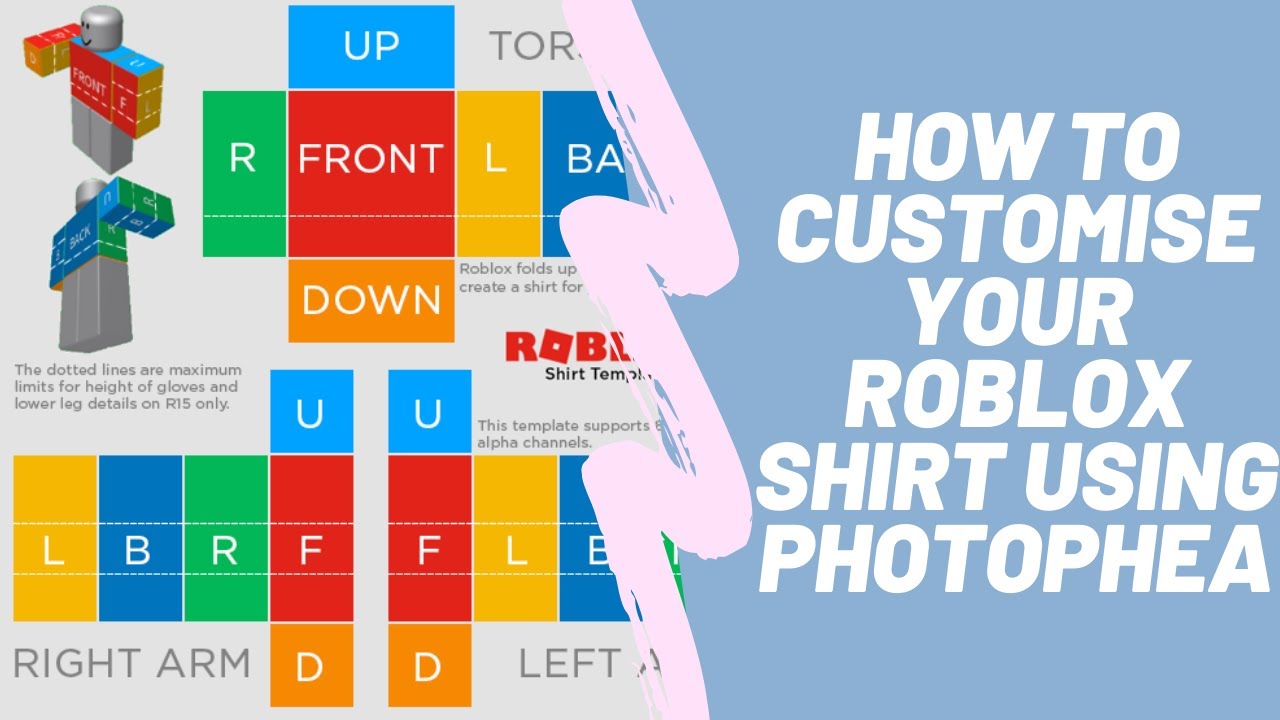
Acquiring the template is straightforward. Head over to the Roblox Developer Hub or search for 'Roblox shirt template' on Google Images. The official template is usually a PNG file with transparent sections, showing the front, back, left, and right sides of the torso, plus the sleeves. Save this image to your computer. It serves as your canvas, ensuring your designs fit perfectly onto the Roblox avatar model. Think of it as your blueprint; designing directly on it prevents alignment issues and streamlines the creation process.
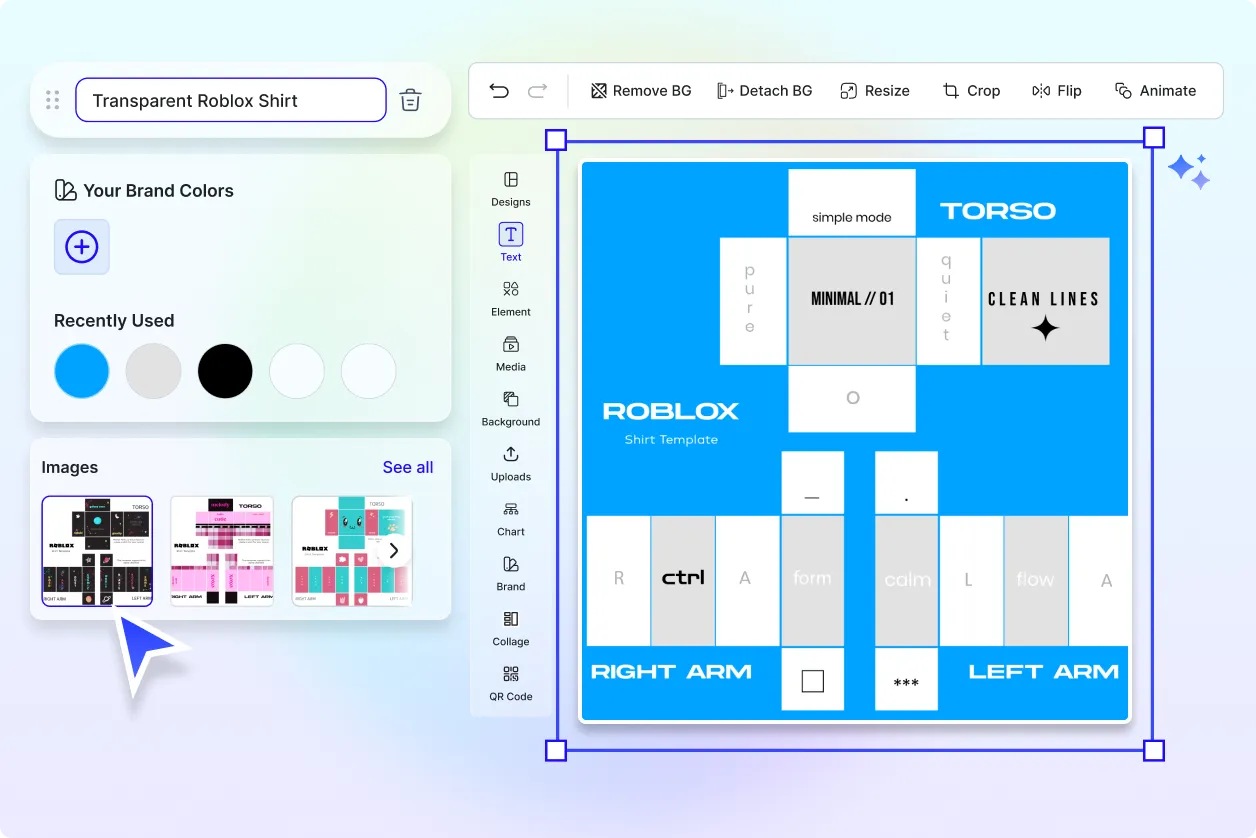
Step-by-Step Guide: How Do I Design the Shirt Image Itself?
Designing your shirt involves creativity and careful application within your chosen image editor. Here's a streamlined process:
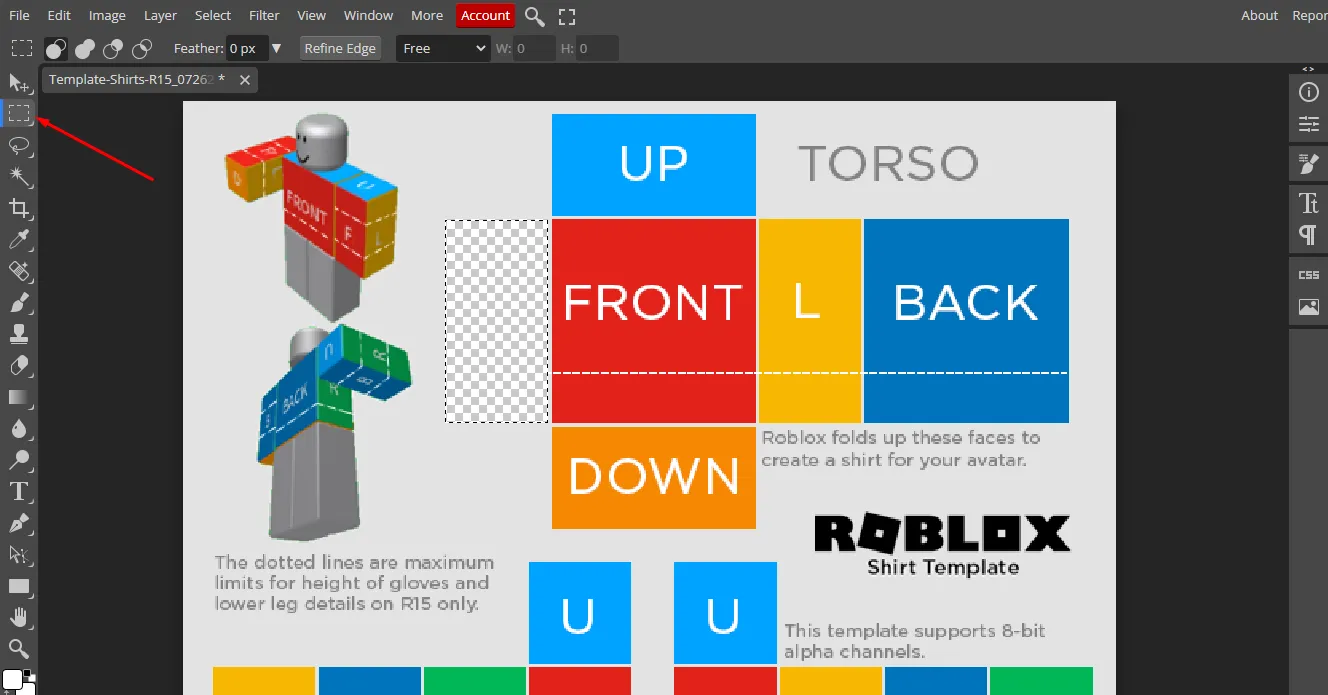
Open the Template: Launch your image editor and open the Roblox shirt template you downloaded. Keep the template on a separate layer and ensure it's at the top, set to an overlay or transparency mode, so you can see your design underneath.
Conceptualize Your Design: Think about what you want your shirt to convey. Is it a cool pattern, a logo, a specific texture, or a character outfit? Sketch your ideas roughly if needed.
Add Colors and Base Shapes: Start by filling in the main sections of the shirt with base colors. Use separate layers for different elements – this makes editing much easier. For example, one layer for the main torso color, another for sleeves, etc.
Incorporate Details: Now add logos, text, textures, or intricate patterns. Pay close attention to how elements will wrap around the avatar. The front panel is for the chest, the back for the back, and the narrow side panels for the avatar's sides. Remember the sleeves have top, bottom, and side sections.
Shading and Highlights (Optional but Recommended): To make your shirt look more realistic and professional, add subtle shading and highlights. Darken areas that would naturally be in shadow (e.g., under the arms, along seams) and lighten areas that would catch light. This adds depth and dimension.
Refine and Review: Zoom in and check for pixelated edges, misalignments, or color inconsistencies. Ensure all parts of the template that are meant to be part of the shirt are filled, and transparent areas (like the head/neck hole) remain transparent. The final image should be 585 pixels wide by 559 pixels tall.
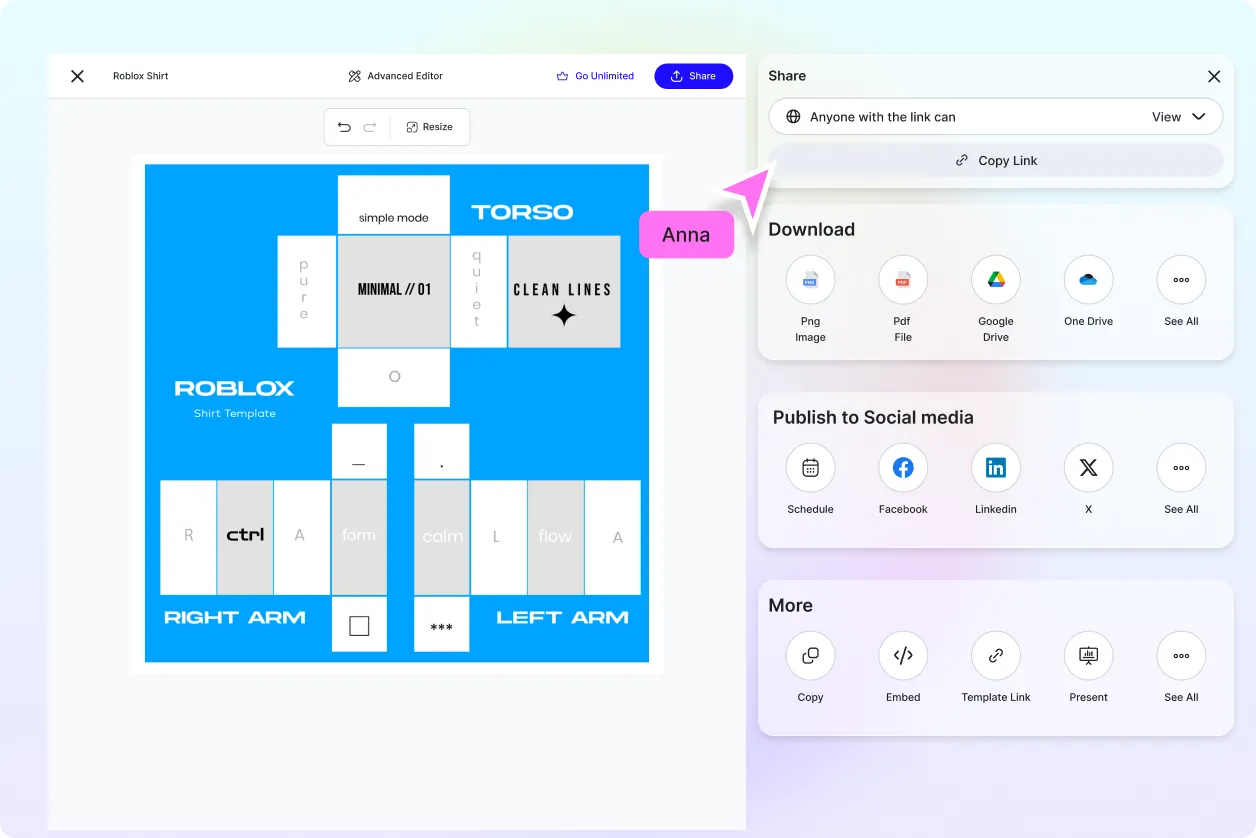
What are the Key Steps to Upload My Custom Shirt to Roblox?
Once your design is perfect, it's time to bring it into Roblox. This is where your Roblox Premium subscription comes into play.
Save Your Design: Save your completed shirt design as a PNG file. PNG supports transparency, which is vital for the shirt's non-clothing areas.
Navigate to the Create Page: Log in to Roblox and click on the 'Create' tab at the top of the website. This takes you to the Roblox Creator Dashboard.
Select 'Creations' and then 'Shirts': On the left-hand menu, under 'Creations', select 'Shirts'. You'll see an option to 'Choose File'.
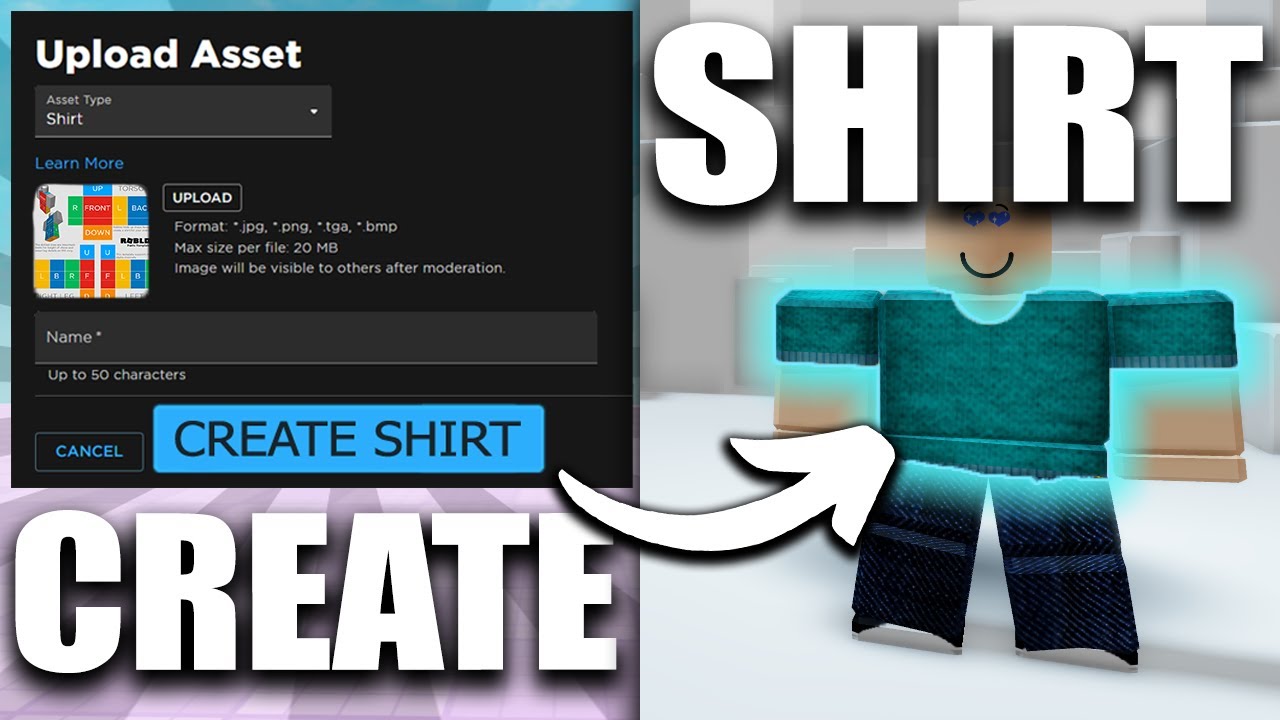
Upload Your File: Click 'Choose File' and select your PNG shirt design. Give your shirt a descriptive and appealing name. This name will appear in the catalog if you choose to sell it.
Confirm Upload: You'll be prompted to confirm the upload. There's a small Robux fee (typically 10 Robux) to upload any clothing item. Confirm the transaction, and your shirt will be submitted for moderation. Roblox reviews all uploads to ensure they comply with their Terms of Service and Community Standards. This process can take a few minutes to several hours.
How Much Does It Cost to Upload a Custom Shirt on Roblox? Can I Sell My Creations?
Yes, there's a small fee to upload custom clothing. Typically, it costs 10 Robux per item (shirt or pants). This one-time fee covers the moderation process and hosting. The good news is, if you have Roblox Premium, you're already poised to potentially earn back those Robux and more! Once your shirt is approved, you have the option to sell it on the Roblox catalog. Navigate back to your 'Creations' -> 'Shirts' page, select your approved shirt, and click the 'Configure' gear icon. Here, you can toggle 'Sell this item' to ON and set your desired Robux price. Remember that Roblox takes a commission on all sales, but you'll receive a percentage directly into your account. This is a fantastic way to monetize your creativity and contribute to the vibrant Roblox economy, especially for gamers looking for budget-friendly ways to enhance their hobby.
What are Some Pro Tips for Making My Shirts Look Great and Sell Well?
Creating a visually appealing and popular custom shirt requires more than just basic design skills. Here are some pro tips to get you started:
Utilize Templates: Always use the official template and double-check alignment. Even a slight misalignment can make your shirt look off-kilter on an avatar.
High-Quality Textures: Use high-resolution textures and images. Pixelated or blurry designs look unprofessional and deter potential buyers.
Theme and Niche: Consider popular trends or niche interests within Roblox. Are players looking for specific game-themed outfits, aesthetic styles (e.g., 'cottagecore,' 'cyberpunk'), or roleplay attire? Staying current with trends can significantly boost visibility, much like keeping up with the latest social/cozy games or esports events.
Shading is Key: Invest time in subtle shading and highlights. This adds depth and makes your 2D design appear more 3D on the avatar, significantly enhancing its quality.
Unique Branding: If you plan to create multiple items, develop a unique brand or signature style. This helps players recognize and seek out your creations.
Promote Your Work: Share your creations with friends, in Roblox groups, or on social media platforms like Discord. Engaging with the community is crucial for visibility.
Test on Avatar: Before uploading, test your design on a Roblox avatar model within your image editor if it supports it, or on a private test game after upload. This helps catch any last-minute issues.
Are There Any Copyright Rules or Content Guidelines to Be Aware Of?
Absolutely. Roblox has strict Terms of Service and Community Standards that all creators must adhere to. Ignoring these can lead to your shirt being rejected, your account being moderated, or even banned. Here are key points:
No Copyright Infringement: Do not use copyrighted material without permission. This includes logos, characters, or designs from popular brands, movies, or other games. Originality is paramount.
Appropriate Content: All designs must be family-friendly and appropriate for all ages. Avoid anything depicting violence, gore, nudity, sexually suggestive themes, hate speech, or illegal activities.
Personal Information: Do not include any real-world personal information about yourself or others.
Scams/Off-Site Links: Do not include links or text that attempts to direct users to external websites or scams.
Roblox uses both automated and human moderation, so always err on the side of caution. Creating original, respectful, and safe content ensures a smooth and rewarding experience for everyone.
How Can I Balance My Roblox Creation Time with My Real-Life Responsibilities?
For many gamers, especially those juggling jobs and families, time is a premium. You want to enjoy your hobbies, but not at the expense of other commitments. Here's how to integrate Roblox shirt creation efficiently:
Batch Create: Dedicate a specific block of time (e.g., an hour on a Saturday morning) to design several shirts at once. This 'batch processing' can be more efficient than designing one shirt at a time, allowing you to get into a creative flow.
Use Simple Tools: If time is very limited, opt for simpler online image editors. They might have fewer advanced features, but they're quicker to learn and use for basic designs.
Leverage Community Resources: Look for free-to-use textures or public domain design elements online. This saves you time on creating everything from scratch.
Prioritize: Decide if you want to create highly intricate, time-consuming designs, or if simpler, fun designs are enough. Not every shirt needs to be a masterpiece. Sometimes a clever, minimalist design performs just as well.
Short Bursts: Instead of one long session, break down design tasks into 15-20 minute bursts. Design a logo during a lunch break, or refine shading while waiting for dinner. Mobile dominance in gaming shows us that short, frequent interactions are powerful.
Connect Socially: Discuss design ideas or get feedback from your Roblox friends. Social gaming is about connection, and sharing your creative process can be part of the fun and help you refine ideas faster.
By smart time management, you can continue to enjoy the creative process of making custom Roblox shirts without feeling overwhelmed, keeping your gaming hobby balanced with your life. This approach is key for the average gamer who values both their digital and real-world commitments.
FAQ Section
How long does it take for Roblox to approve a shirt?
Roblox moderation times can vary. Typically, a shirt can be approved anywhere from a few minutes to several hours, though in rare cases it might take up to 24-48 hours. Factors like current moderation queue volume and the complexity of your design can influence the waiting period.
Can I make shirts without Roblox Premium?
No, an active Roblox Premium subscription is required to upload and publish custom shirts (and pants) to the platform. Without Premium, you can design the image, but you won't have the option to upload it for use in-game or for sale.
What image resolution is best for Roblox shirts?
The optimal resolution for Roblox shirt templates is 585 pixels wide by 559 pixels tall. Sticking to these dimensions ensures your design maps correctly onto the avatar without stretching or pixelation, maintaining high quality.
Are there free shirt templates available?
Yes, the official Roblox shirt template is freely available on the Roblox Creator Hub and can be found with a simple web search. Many community members also share modified templates for specific design styles, but always ensure they are compatible with official dimensions.
Can I make pants or T-shirts in the same way?
You can make custom pants using a similar process with a different template; an active Roblox Premium subscription is also required for pants. T-shirts, however, are simpler decals that lay on top of existing shirts and do not require Premium to upload, only a small Robux fee.
What if my shirt upload fails or is rejected?
If your shirt upload fails, double-check your internet connection, image file type (must be PNG), and dimensions. If rejected after moderation, it usually means your design violated Roblox's Terms of Service or Community Standards. Review the guidelines, make necessary adjustments (e.g., removing copyrighted material), and try uploading again.
Creating custom shirts on Roblox is a rewarding way to inject your personal style into your gaming experience. It's an accessible creative outlet that perfectly fits into a busy lifestyle, offering both personal satisfaction and a chance to engage with the Roblox economy. By following these steps and tips, you're now equipped to design unique apparel, stand out in the metaverse, and make your mark. Remember, the Roblox community thrives on creativity and individuality, and your contributions are a big part of that. What's your biggest gaming challenge or next creative project? Comment below and let us know!
Simple steps to create custom Roblox shirts. Essential tools needed for shirt design. Uploading and selling shirts on Roblox. Understanding Roblox Premium requirements. Tips for high-quality shirt designs. Navigating Roblox content guidelines.
35


How To Make A Roblox SHIRT In 2026 YouTube . How To Make Your Own Shirt In Roblox YouTube . How To Make A Easy Simple Shirt On Roblox 2026 YouTube . How Do I Make Clothes On Roblox In 2026 5. Customizing The Template With A Graphic Design. How To Make Your Own Shirts On Roblox How To Design Clothing Sddefault

How Do I Make Clothes On Roblox In 2026 . How Do I Make Clothes On Roblox In 2026 . How Do You Make Shirts In Roblox 2026 Roblox Shirt Templates How To Create Roblox Shirts And Pants.webp. How To Shirt Template On Roblox Infoupdate Org A Roblox T Shirt Design Template Shown In The Image . Free AI Roblox Shirt Generator Create Roblox Shirt Designs Online No Roblox Shirt 2.webp


Free Roblox Shirts Design Your Own Style Screen Shot 2022 12 13 At 12.56.01 PM . Free AI Roblox Shirt Generator Create Roblox Shirt Designs Online No Roblox Shirt 5.webp. Roblox Shirt Template How To Make Custom Roblox Shirts Beebom How To Make A Shirt On Roblox . Make Your Own Custom ROBLOX Shirts FREE Boys Girls YouTube . Make A T Shirt Roblox How To Make A Roblox Classic T Shirt FREE


How Do I Make Clothes On Roblox In 2026 . Free AI Roblox Shirt Generator Create Roblox Shirt Designs Online No Hoodie Roblox Shirt Template Edit Online . How To Make A Roblox Shirt 2024 Create A Shirt On Roblox EASY GUIDE. How To Make A Roblox Shirt In Paint Net At Maya Taber Blog . How Do I Make Clothes On Roblox In 2026


How Do You Make Shirts In Roblox 2026 How To Make A Shirt In Roblox Full Guide Or Make Your Own Roblox Shirt Easily . Create Your Own Shirt Roblox V4 460px Create A Shirt In Roblox Step 1 Version 3 . How To Design Roblox Clothes On Mobile Devices 63345cdc B656 44b2 85bb. Free Cute Roblox Shirt Template To Edit Online Transparent Roblox Shirt Template Edit Online . What Is A Shirt In Roblox At Eileen Towner Blog


How To Make Your Own Shirts On Roblox How To Design Clothing . Create Your Own T Shirt Roblox Amazon Com THE GAME IS FIXED MAKE YOUR . How To Create A Shirt In Roblox EASY 2026 Update YouTube . Classic Roblox Apparel What Are Old Roblox Shirts Roblox Classic Shirt Template Edit Online . Shirt Template Roblox Design


How To Create Custom T Shirts In Roblox FOR FREE YouTube . How To Make A Custom Roblox Shirt Using Photopea YouTube . How To Make Clothes On Roblox Shirts Clothing Items VIDEO How . How To Make Upload Shirts In Roblox 2023 Gamer Tweak Roblox Make Custom Shirt Using Template . Roblox Shirt Template How To Make Custom Roblox Shirts Beebom Opacity And Blending Mode For Shirt Template